
DIY Papier-Mache Christmas Ornaments
This Post May Contain Affiliate Links. Please Read Our Disclosure Policy.
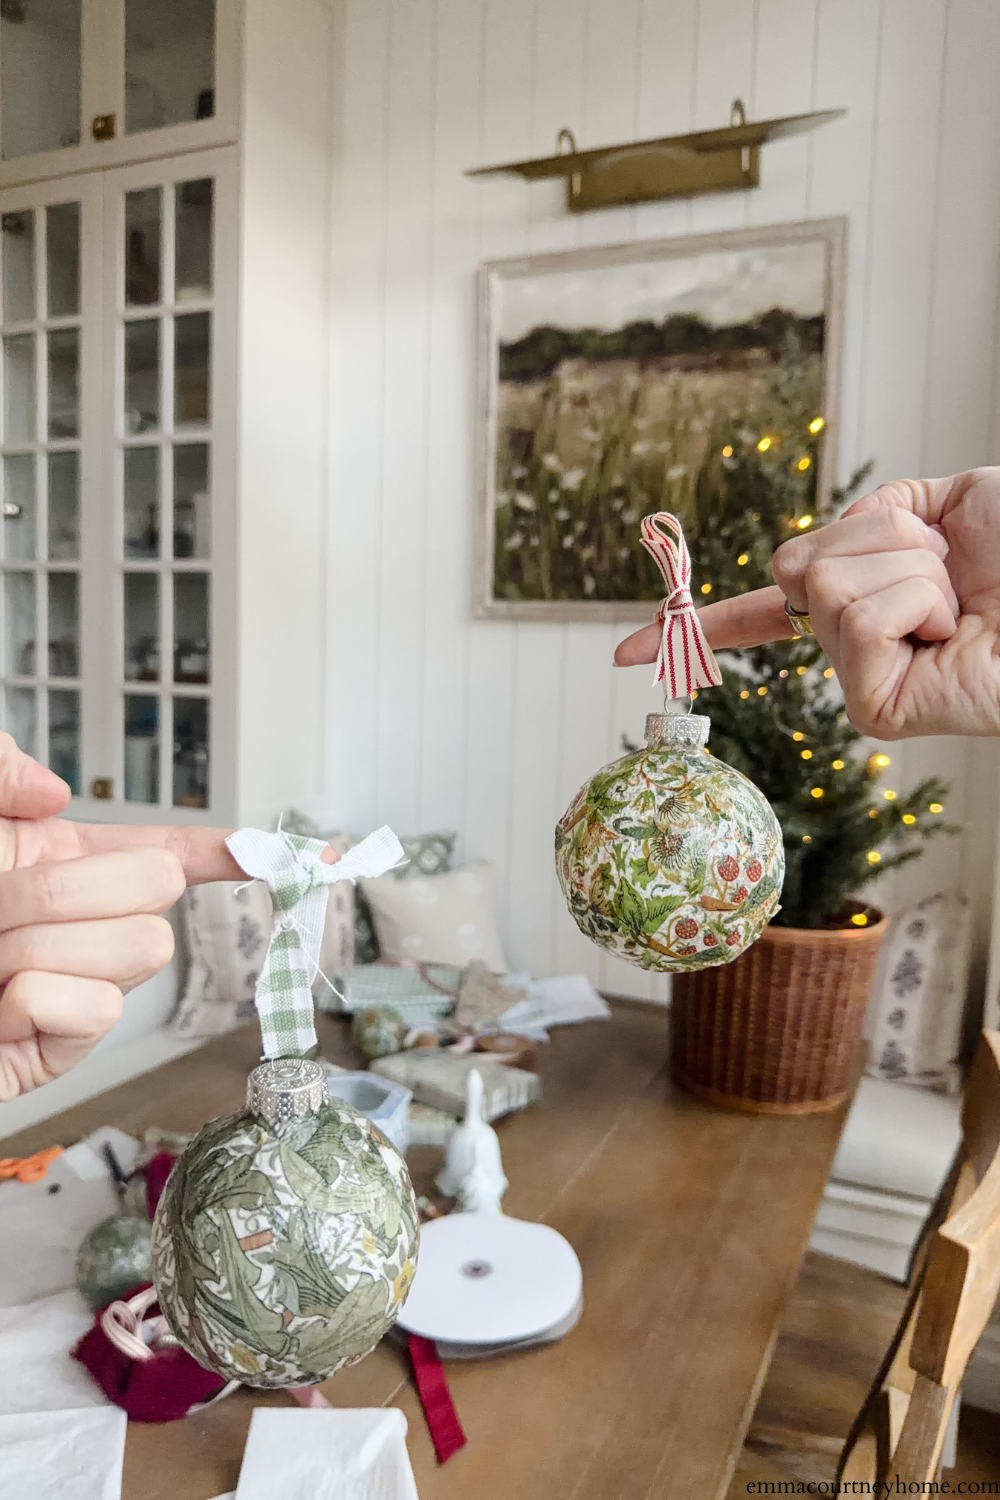
If you’re like me and ended up with a bunch of leftover clear plastic ornaments from last year’s viral Taylor Swift friendship bracelet ornament trend, or want to reuse some old ornaments, here’s a fun way to give them a second life. A little Mod Podge, some pretty napkins or tissue paper, and you’ve got the sweetest handmade papier-mache ornaments for your tree.
Estimated reading time: 5 minutes

What You’ll Need
- Clear plastic ornaments (any size works) or old ornaments
- Decorative paper napkins or tissue paper
- Mod Podge (I used satin, but matte would be ideal)
- A small paintbrush/Foam brush
- Ribbon for hanging
- Optional: a bit of white acrylic paint
Step-by-Step

- Prep your ornament
Take the cap off the ornament and set it aside. If you find the clear plastic isn’t giving you quite the look you want, pour a little white paint inside, swirl it around to coat evenly, and pour out the excess. This gives you a soft, opaque base that makes your napkin design stand out.

- Prepare your napkins
Napkins usually have about three thin layers of paper. Gently separate them by rubbing the corner between your fingers until they start to come apart. I found that two layers worked best since they were easy to apply and stayed smooth. Three layers felt a bit too thick and tricky to work with. Tip: If you don’t have napkins you love, tissue paper works beautifully for this too.

- Apply the design
Cut your napkin or tissue paper into strips. Brush a thin layer of Mod Podge onto a section of the ornament, lay down a strip, and smooth it gently with your fingers or brush. Continue around the ornament until it’s covered.


- Let it dry
Once finished, set the ornaments aside to dry completely before handling.
- Add the finishing touch
Replace the cap and tie with a pretty ribbon. Satin, velvet, or even a bit of fabric all work, depending on your style.
A Few Things I Learned
- Two napkin layers work best. Three layers are too thick to handle easily.
- The white paint trick inside is perfect if your ornaments look too transparent.
- Matte Mod Podge gives a softer, more vintage finish, but satin works fine too.
- Tissue paper is a great alternative for soft, translucent designs or subtle patterns.
The Final Look
These papier-mache ornaments are simple, a little imperfect, and perfectly festive. I love that they turn leftover materials into something beautiful you can actually use. You can customize them to match your holiday palette, and they make sweet handmade gifts, too. It’s the kind of DIY that feels creative but easy to pull off on a cozy winter afternoon.


