
DIY Breakfast Nook Banquette Using IKEA Besta Cabinets
This Post May Contain Affiliate Links. Please Read Our Disclosure Policy.
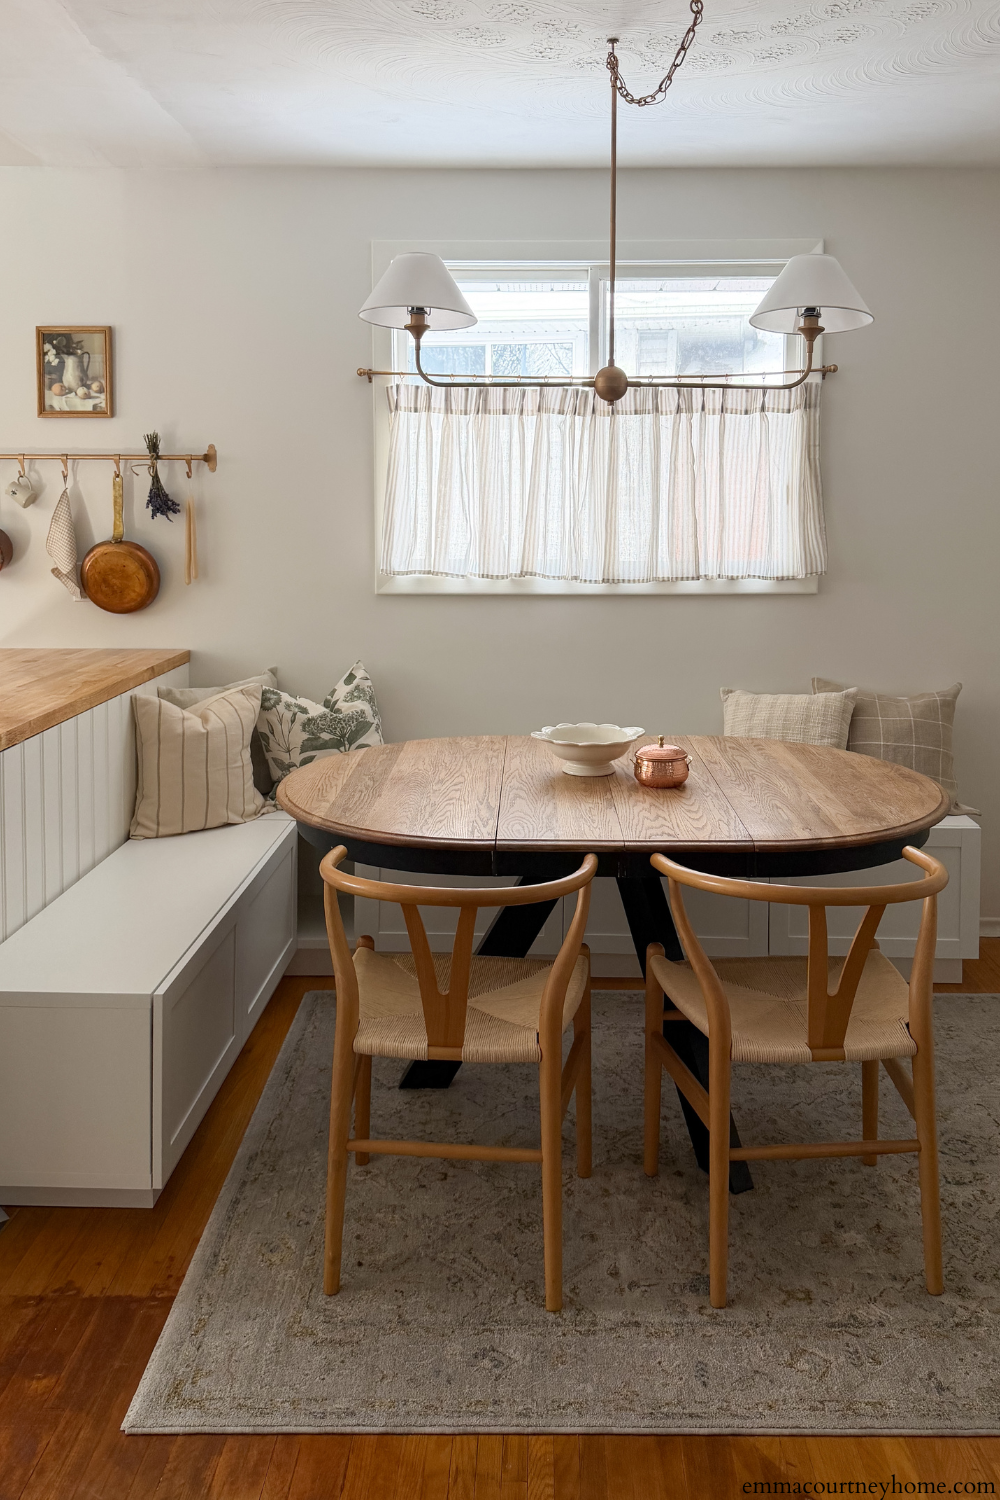
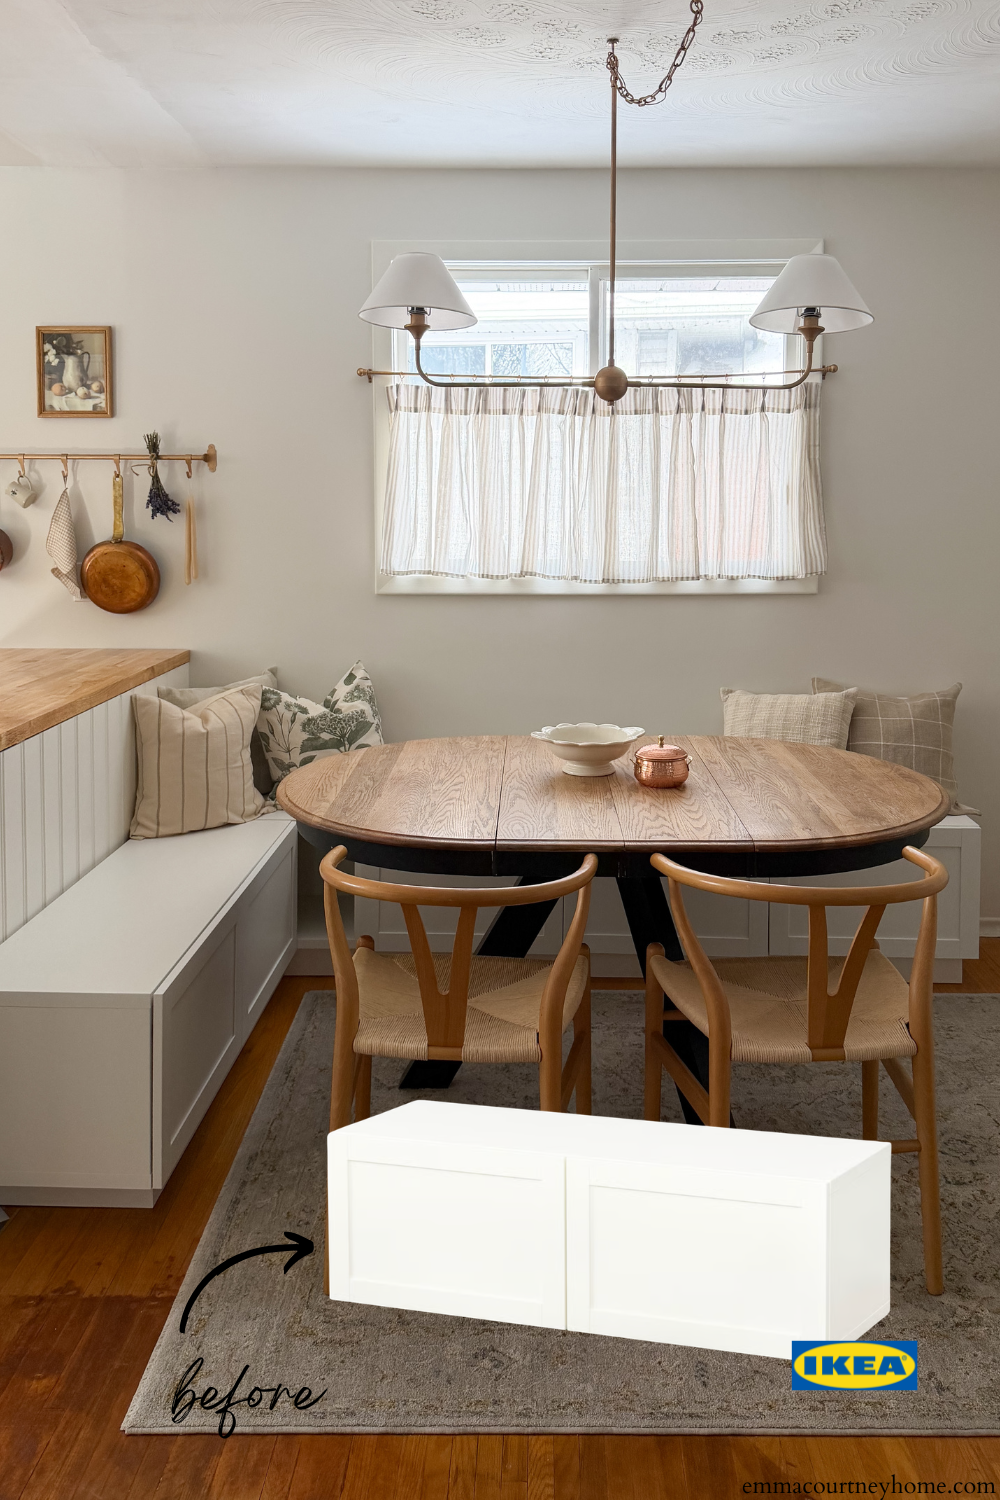
A built-in breakfast nook banquette is one of those features that instantly makes a kitchen feel more custom, but the cost can add up quickly. For my sister’s kitchen, we wanted a budget-friendly solution, so we created a DIY breakfast nook banquette using IKEA Besta cabinets that connect seamlessly to the kitchen peninsula, providing both seating and storage.
This DIY breakfast nook banquette was created using IKEA Besta cabinets and a simple 2×4 base. It is a very approachable IKEA hack that does not require advanced carpentry skills. Below, I am walking through exactly how we built it, step by step.
Estimated reading time: 7 minutes
Why We Chose a Banquette for This Breakfast Nook
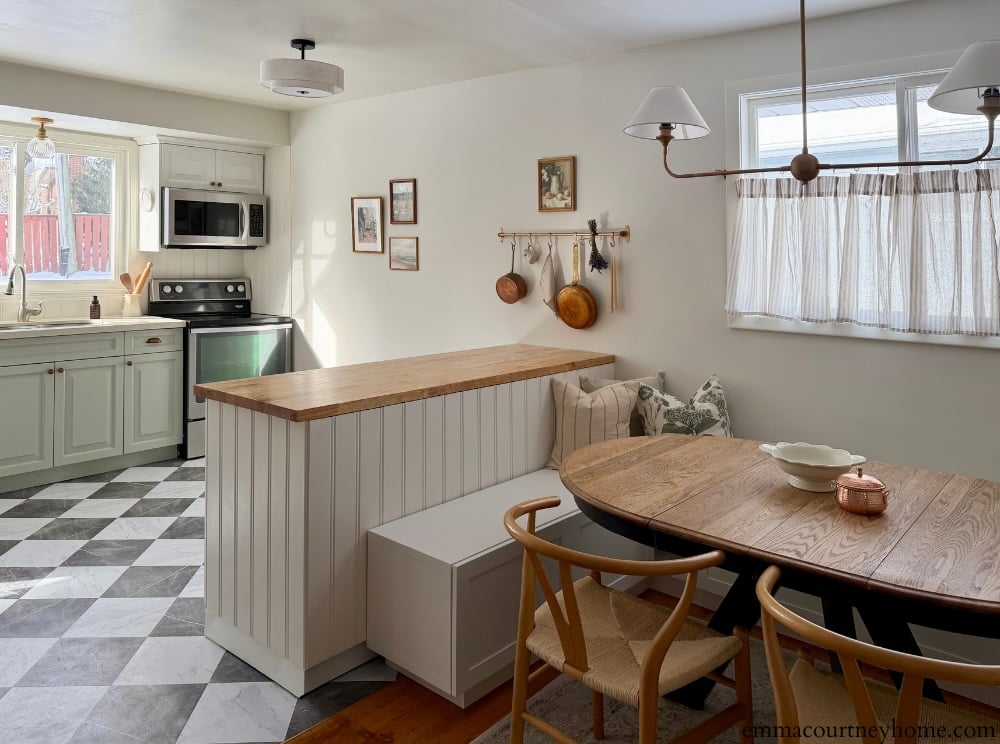
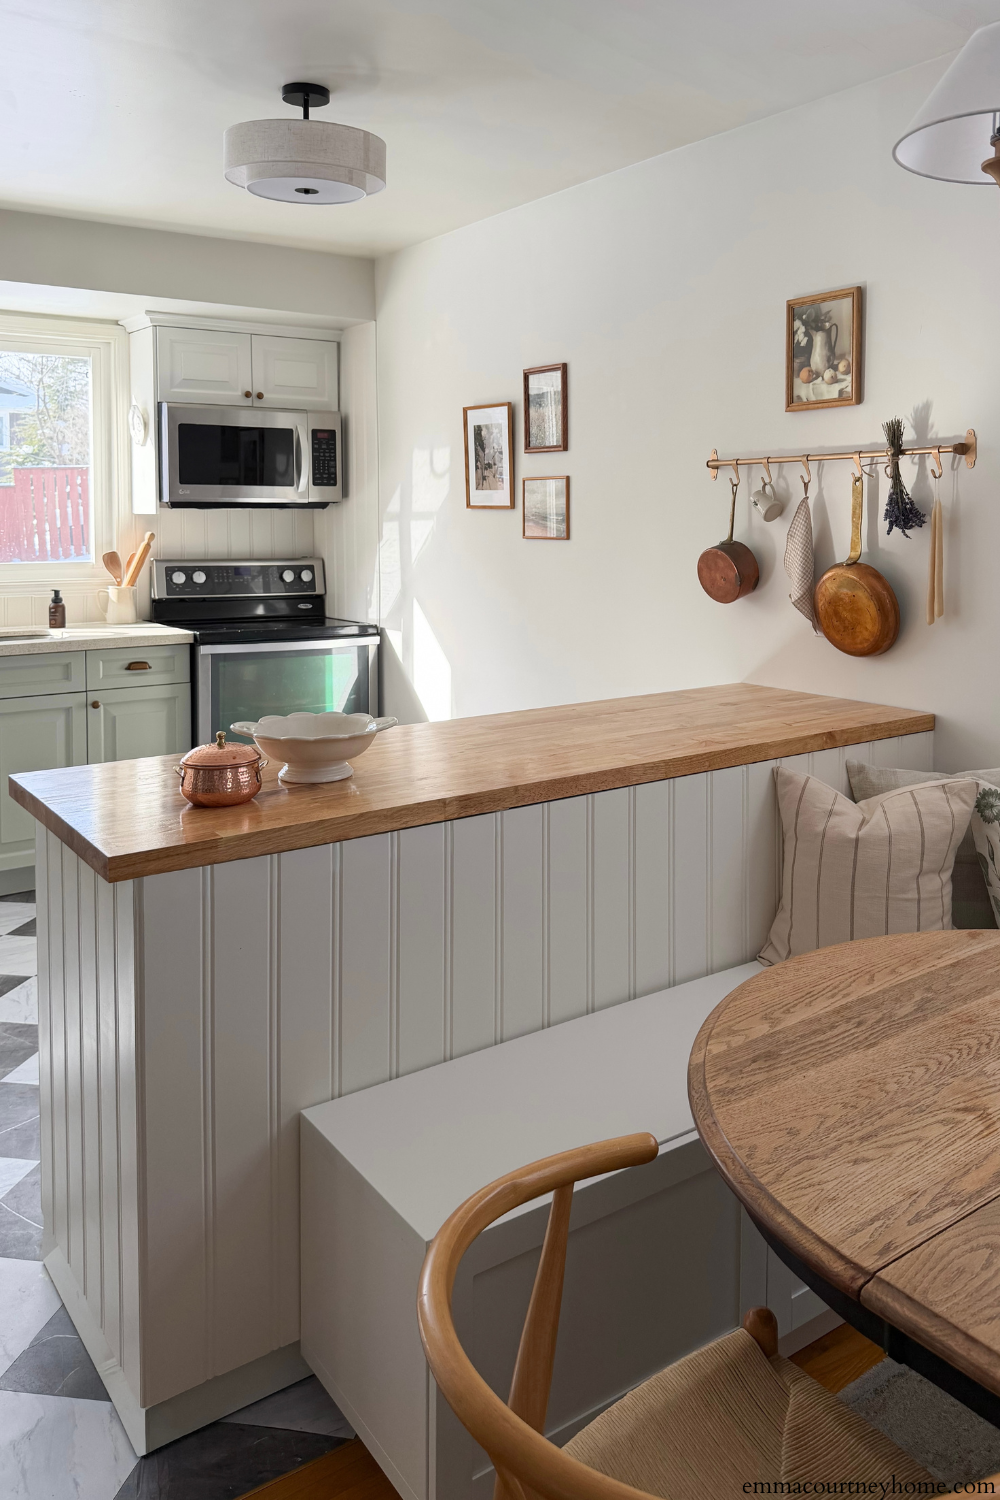
This kitchen already had a peninsula, and the space beside it was the perfect opportunity to add bench seating for a breakfast nook. A banquette allows you to maximize seating in a small footprint, creates a cozy dining area, and adds hidden storage when built with cabinets.
Using IKEA cabinets also keeps this project flexible. The structure can be painted, trimmed, or modified later if needs change.
Looking for more details on this budget-friendly kitchen makeover? Learn more here.
Materials Used for This IKEA Breakfast Nook Banquette
- 3 IKEA Besta units
- 2×4 lumber for the base
- 3-inch wood screws
- Baseboard or kickboard moulding
- Finish nails or Brad Nails and Brad Nailer
- Wood filler
- Paint, optional
Step 1: Planning a DIY Breakfast Nook Banquette
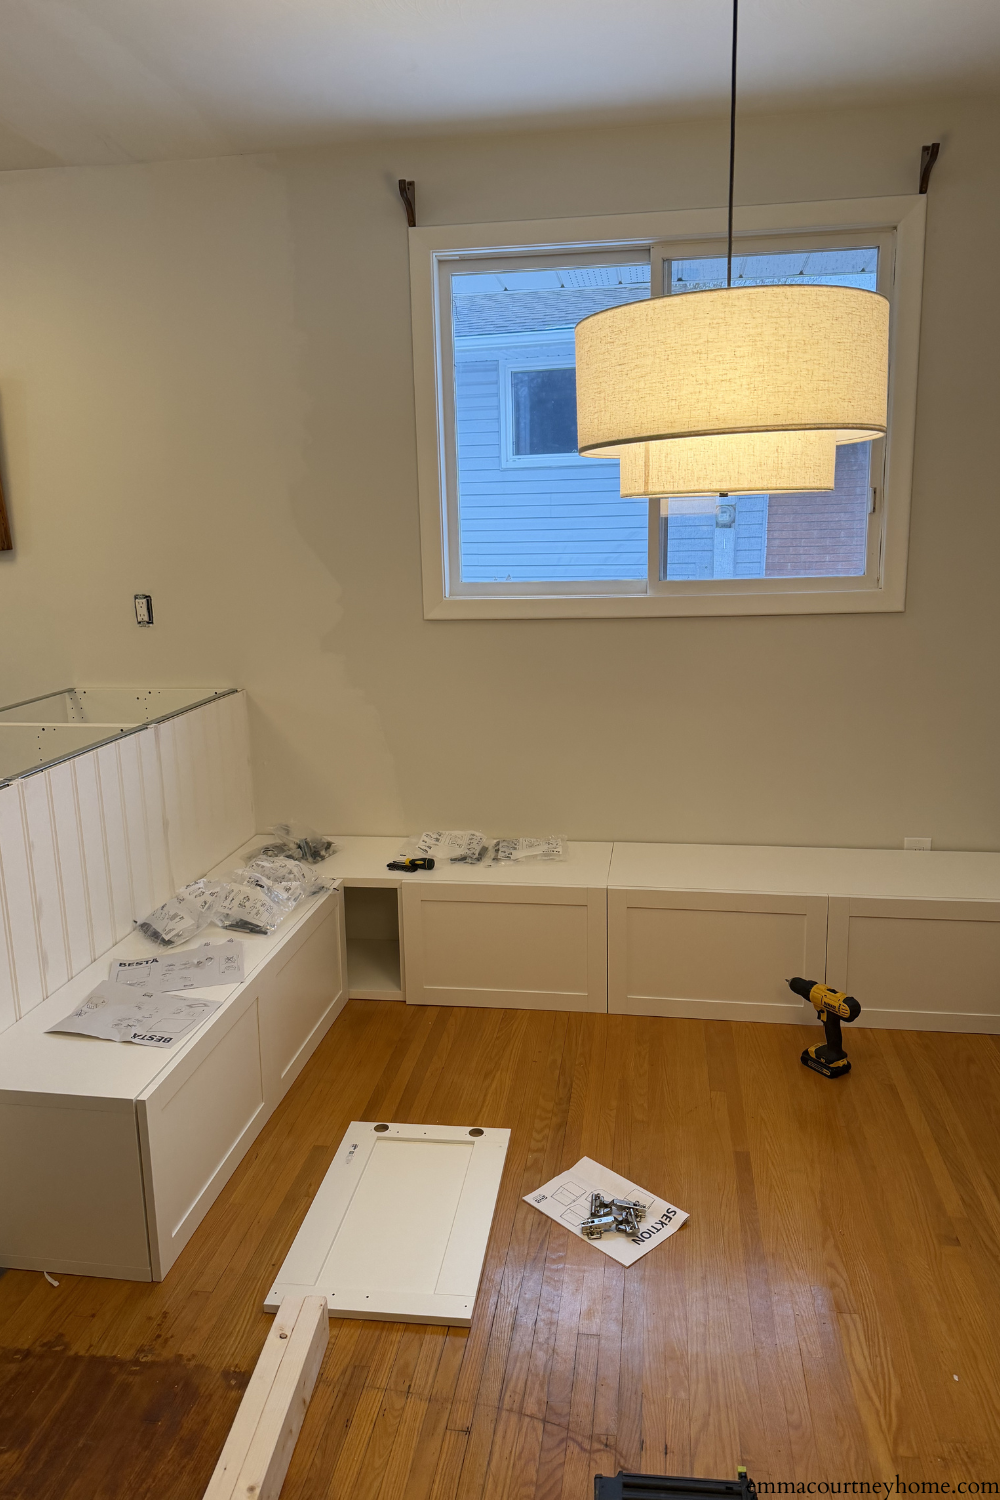
We started by assembling three Besta cabinets and placing them into position to form an L-shaped breakfast nook banquette.
One important decision happens here. When creating an L shape with Besta, one cabinet will push into the corner. If you install a door on that cabinet, it becomes a dead space that is not easily accessible. That trade-off also makes this project quick and straightforward, since no extra work is required to build a custom corner solution.
You have two options:
- Install the door and accept the dead space.
- Leave the door off and plan to add trim or a custom access solution later.
The door pushes the units out about half an inch, so this decision needs to be made before moving forward. There is no right or wrong choice here. It comes down to personal preference.
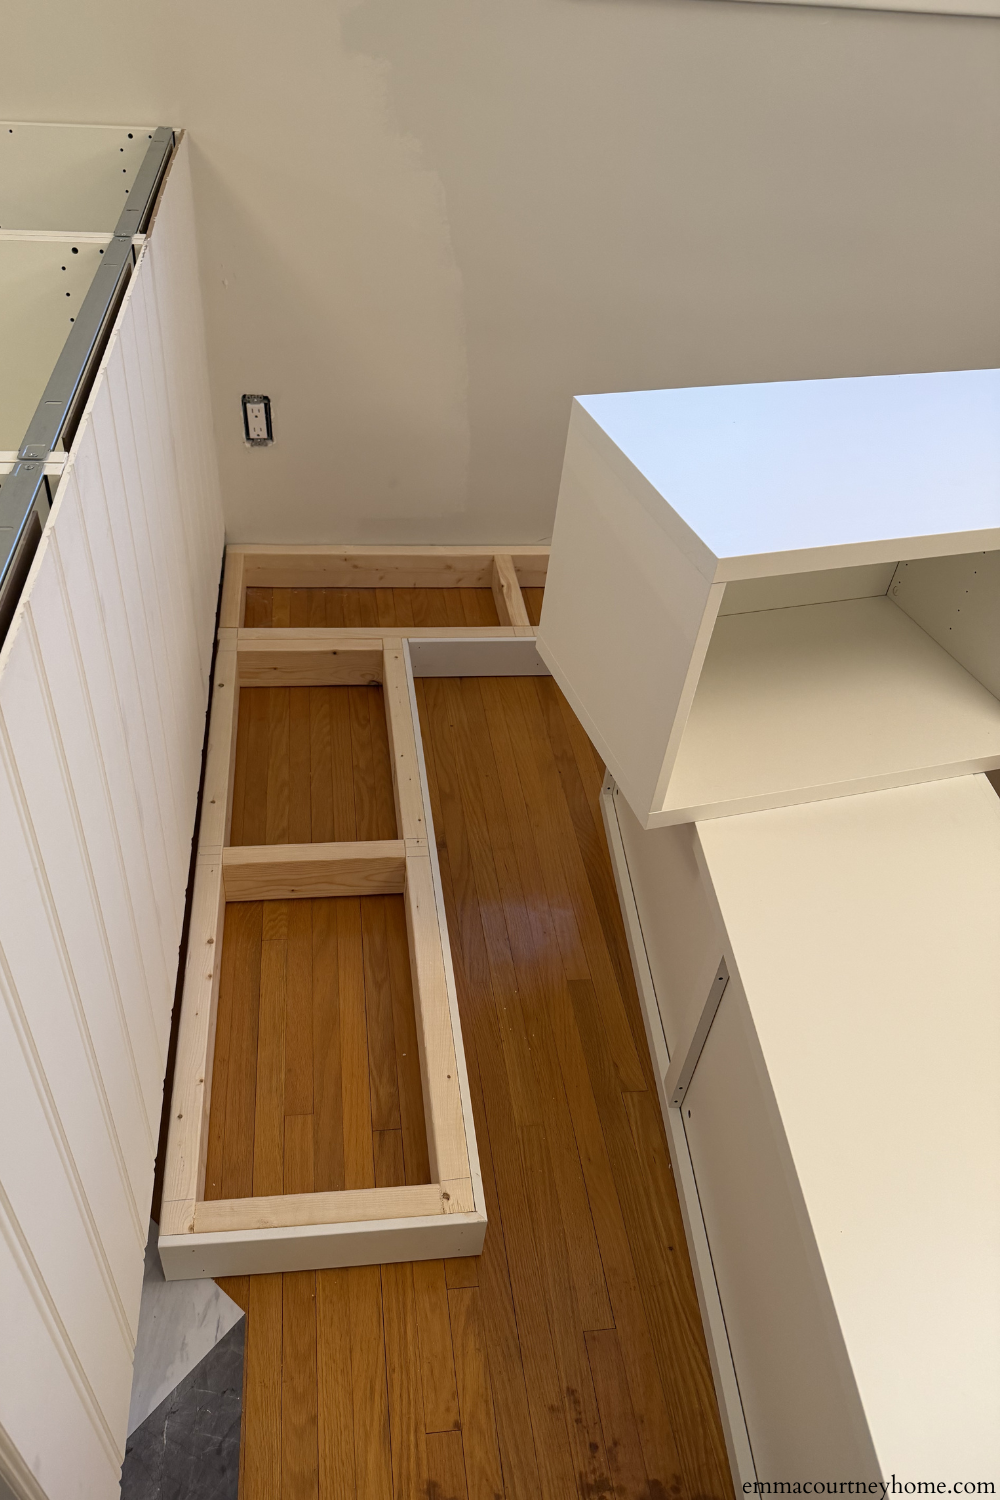
Step 2: Building the Base for the Kitchen Banquette Bench
To give the breakfast nook banquette a built-in look, we created a recessed base using 2x4s.
The Besta units are 16.5 inches deep. We decided to make the base 14.5 inches deep, leaving a 2-inch inset for the kickboard. This gives the bench the proportions of a traditional kitchen banquette bench.
Here is how we built the base:
- Measured the full L-shaped footprint of the cabinets
- Subtracted 2 inches to allow for the inset kickboard
- Cut 2x4s to size
- Added supports running front to back under each cabinet, including the sides, the middle, and where the units meet
- Predrilled holes and assembled the base using 3-inch screws.
- Did a dry fit to confirm everything lined up

Step 3: Adding Kickboards to the Breakfast Nook Bench Base
Before placing the cabinets on top, we finished the visible sides of the base.
We installed baseboard moulding along the front and the exposed side of the banquette. The back of the bench is not visible, so no baseboard was needed there.
After cutting and nailing the baseboards in place, I filled all nail holes for a smooth finish.
One tip here is to remove the existing wall baseboards first so the breakfast nook bench can sit snug against the wall. Once the banquette is in place, you can cut and reinstall the baseboards so they fit tightly against the unit.
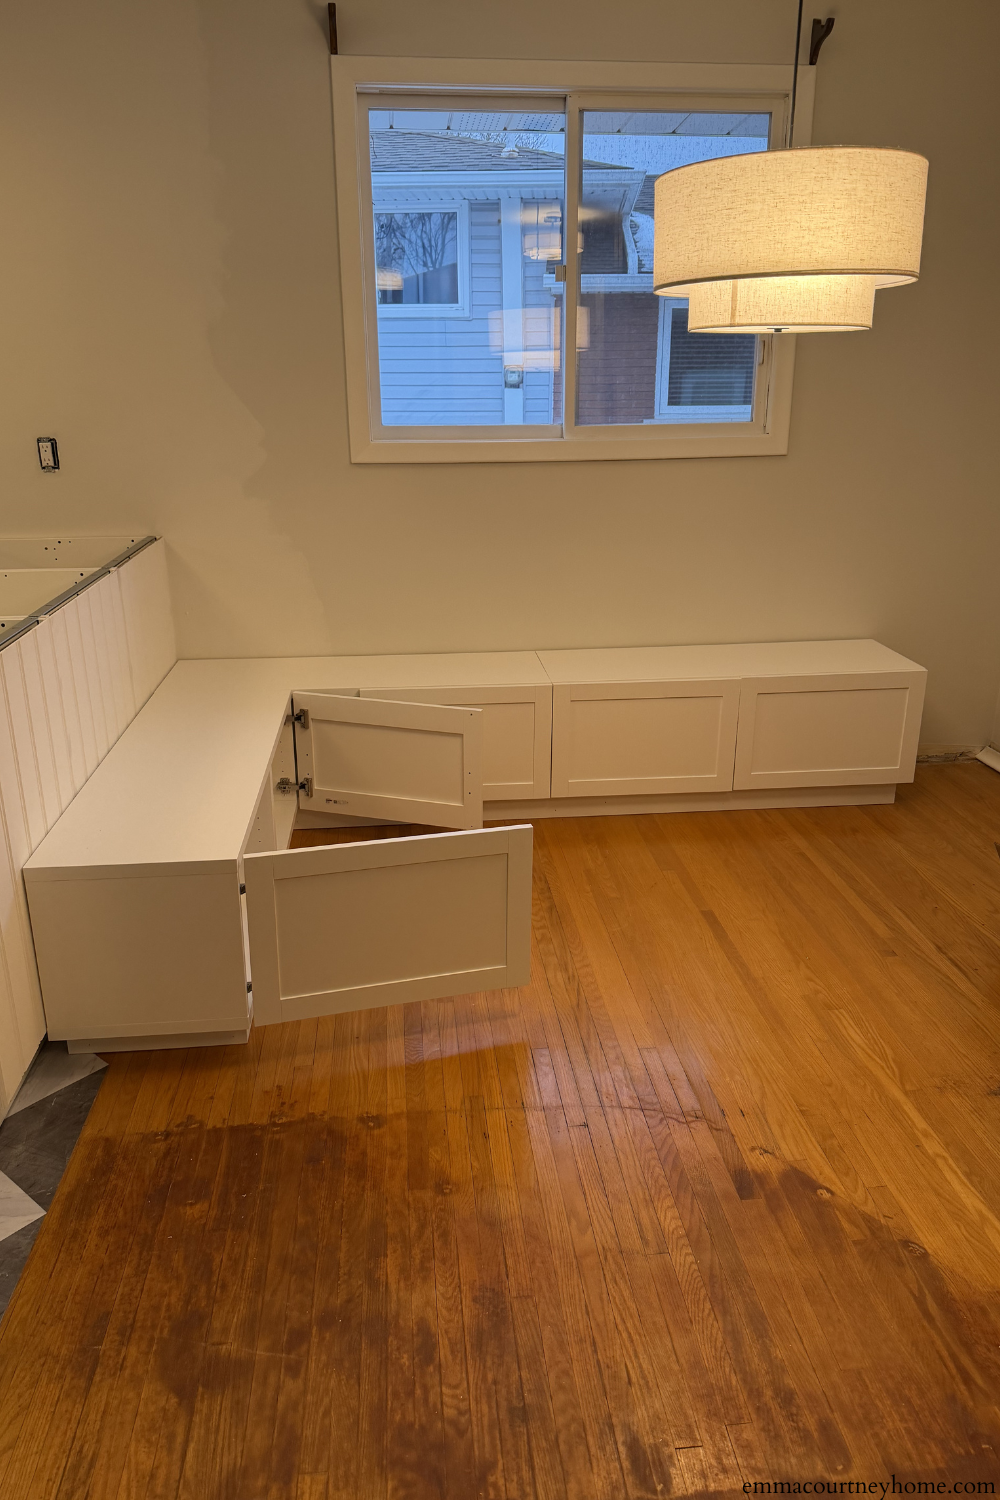
Step 4: Installing and Securing the IKEA Besta Banquette
Once the base was complete, we lifted the Besta cabinets onto the platform.
To finish:
- We screwed the cabinets together, predrilling holes first.
- Then secured the cabinets to the base.
If you want the banquette to remain movable, make sure everything is attached together as one unit. If you want it permanently anchored, I recommend screwing the 2×4 base into the wall studs before placing the cabinets on top.
Both options work. It depends on how permanent you want your breakfast nook seating to be.
Step 5: Painting or Finishing the Banquette Seating
At this point, the structure of the DIY breakfast nook banquette is complete.
You can leave the cabinets white, paint them to match your kitchen, or add trim and panels for a more custom look.
PRO TIP: If you plan to paint, I recommend checking out this post where I share how I like to paint IKEA furniture for a durable finish.
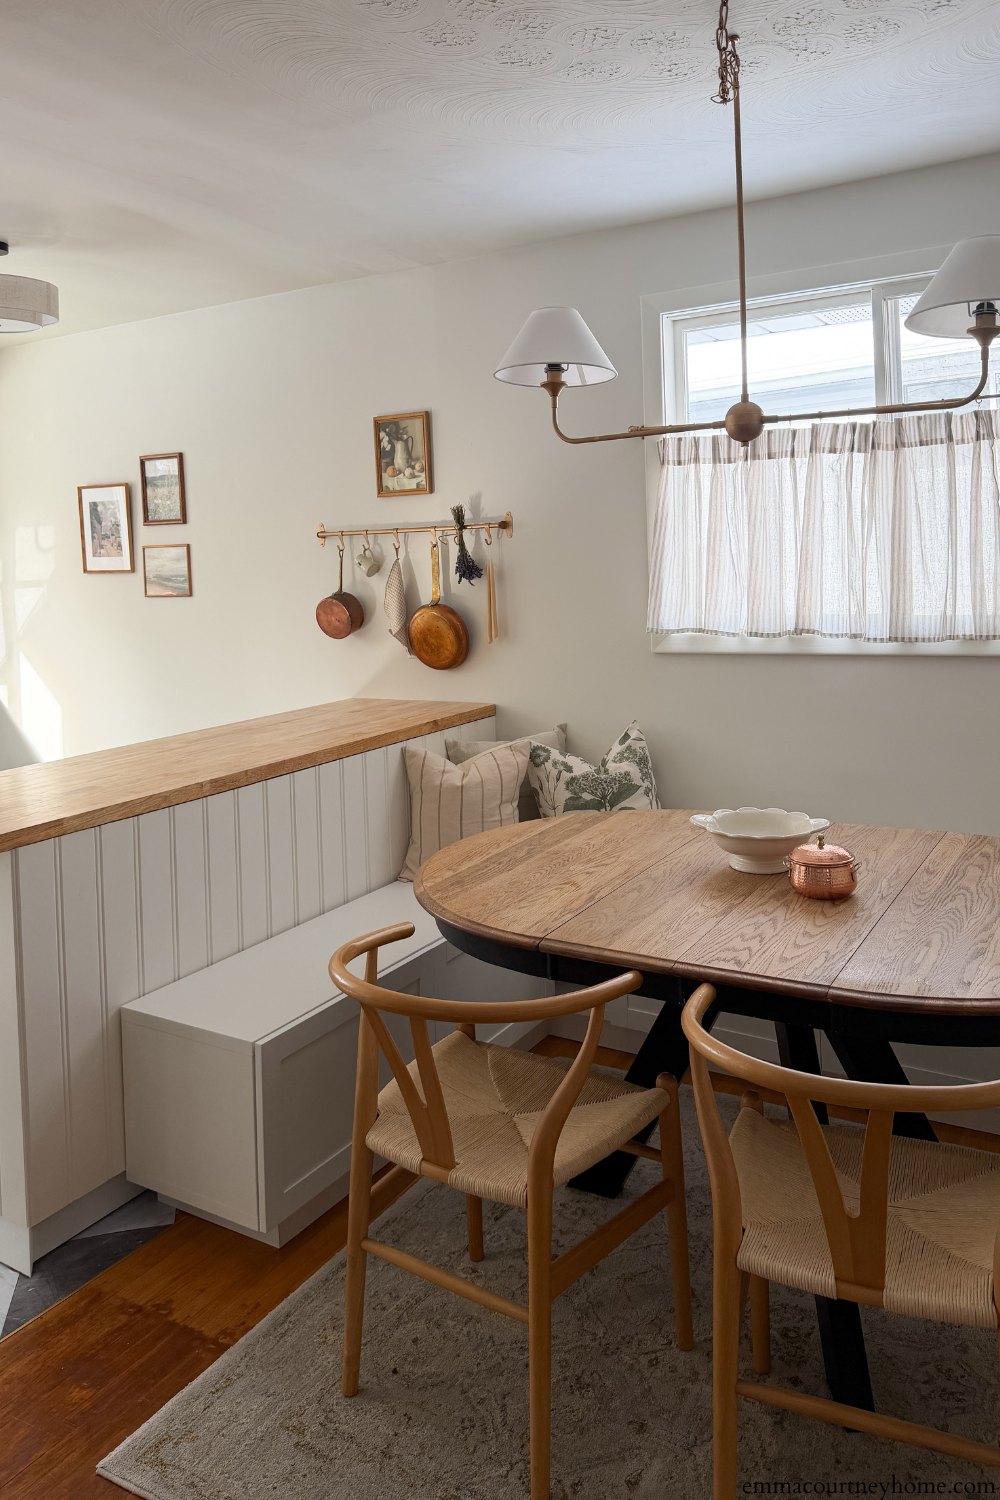
Final Thoughts on This IKEA Breakfast Nook Banquette Hack
This IKEA breakfast nook banquette is a great example of how simple cabinetry can be transformed into something that looks built-in and intentional. By keeping the construction straightforward and making a few design decisions early, this project stays approachable while still delivering a high-end result.
If you are looking to add kitchen banquette bench seating without the cost of custom millwork, this is a hack worth considering.
FAQs
Yes, IKEA cabinets like Besta are a great option for building a breakfast nook banquette. They provide structure and storage, and when placed on a base, they create a built-in look without custom millwork.
Most breakfast nook benches are between 15 and 20 inches deep. The Besta cabinets are 16.5 inches deep, which works well for comfortable seating once cushions are added.
Yes, a base is recommended. It raises the height to standard seating and creates a recessed kickboard, which gives the banquette a more built-in look.
The simplest option is to treat the corner as dead space by pushing one cabinet into it. You can also leave the door off and add access later if you want to use that storage.


Is there a reason you didn’t use the IKEA kallax instead?
That series works well too, but lacks the door options for the fronts!