
IKEA Countertop Cabinet Hack: A Budget-Friendly Solution
This Post May Contain Affiliate Links. Please Read Our Disclosure Policy.
Are you seeking a creative, cost-effective way to revamp your kitchen space? Look no further! The IKEA countertop cabinet hack is the ultimate solution for transforming your kitchen counter into a functional and stylish hub. Today, we’ll explore this look-for-less IKEA kitchen idea, offering you a guide to creating a counter cabinet hack that will have your friends and family swoon over your kitchen’s new aesthetic.
Estimated reading time: 9 minutes

What is a Countertop or Counter Cabinet?
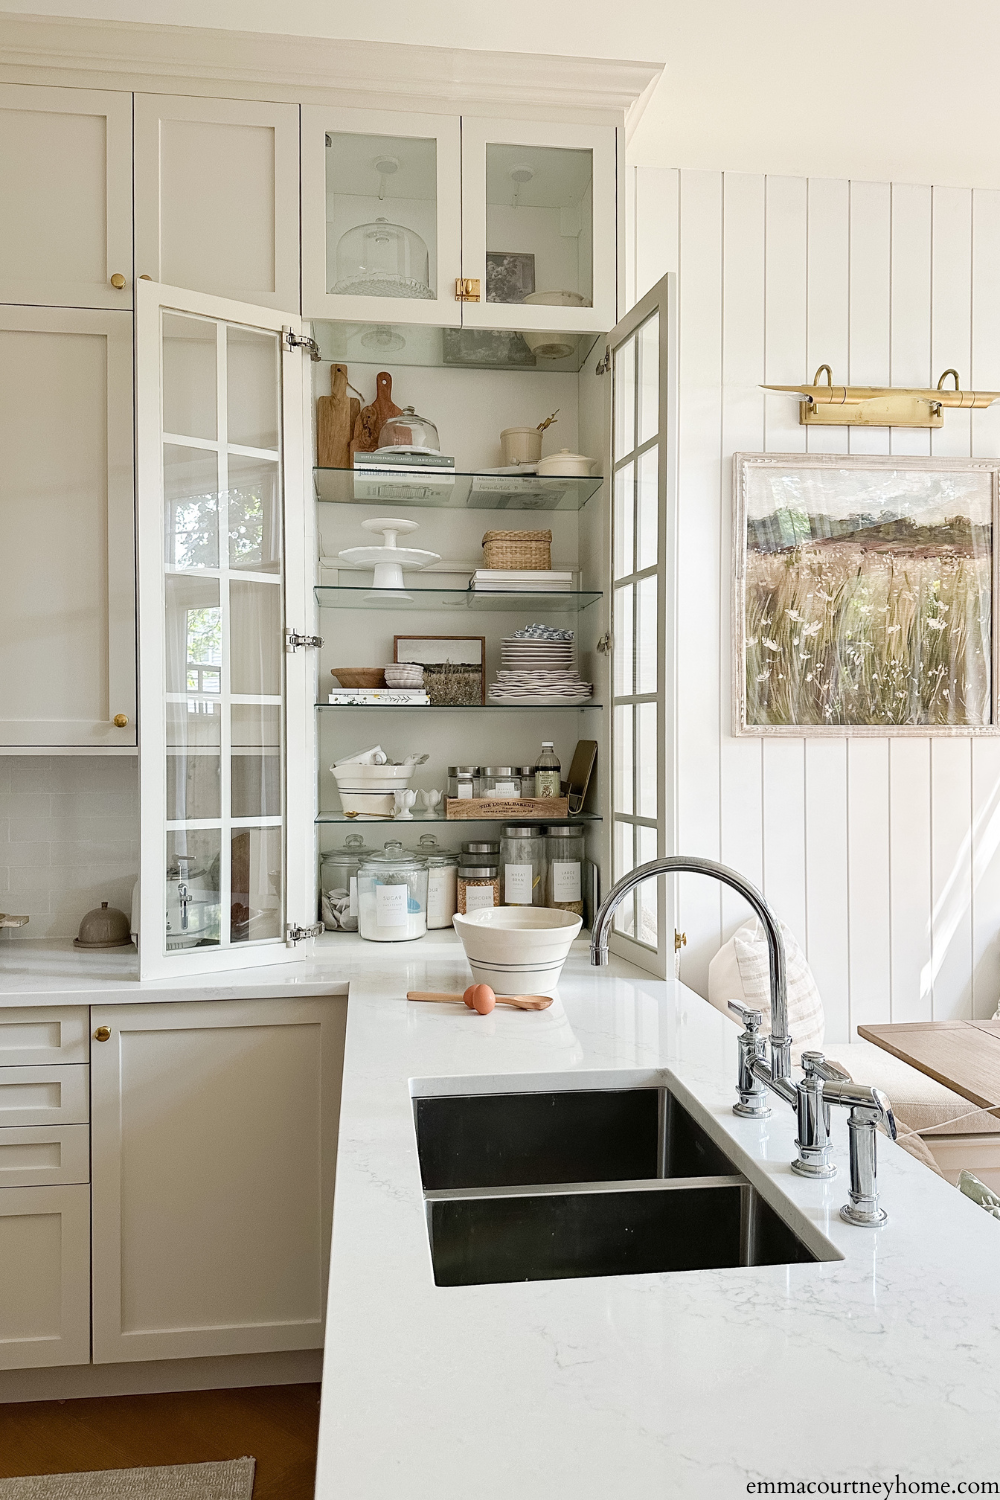
A countertop or counter cabinet, often called simply a “countertop cabinet,” is a storage unit designed to sit on a kitchen or bathroom countertop. It is usually a standalone cabinet that rests directly on the counter’s surface, providing additional storage space and functionality to the area.
Countertop cabinets are typically smaller than traditional floor cabinets or wall-mounted cabinets. They are designed to make the most of vertical space that might otherwise be unused on the countertop. These cabinets come in various styles, designs, and materials, allowing homeowners to choose one that complements their kitchen or bathroom decor.

Please note this photo shows an example of a countertop cabinet, but it is not IKEA. For more details, visit Tiffany’s website.
The primary purpose of a countertop cabinet is to organize and store frequently used items or small appliances in an easily accessible manner. They can store dishes, mugs, spices, cooking utensils, or personal care products in the bathroom. Sometimes, they are used as an appliance garage to store items like toasters, coffee machines, and more.
What is the IKEA Countertop Cabinet Hack?
The IKEA countertop cabinet hack involves repurposing IKEA cabinets into standalone units that rest gracefully on your kitchen counter. Doing so creates more storage space and introduces a unique and custom touch to your kitchen setup.
Why Opt for a Countertop Cabinet?

2.1 Maximizing Storage Efficiency
Kitchen counter cabinets provide a smart way to enhance your kitchen’s storage capacity. With a countertop cabinet, you can use the vertical space often underutilized in most kitchens. Say goodbye to cluttered countertops and hello to a neat and organized cooking area!

2.2 Unleashing Your Creativity
The beauty of this hack lies in its versatility. IKEA offers a vast range of cabinet designs, finishes, and sizes, so you can pick the perfect one that complements your kitchen’s aesthetics. You can even mix and match different cabinet styles to add a touch of personality and charm to your space.
Want to learn more about my kitchen reno? Learn more here.
A Guide to the IKEA Countertop Cabinet Hack
3.1 Design your IKEA Kitchen
Use the IKEA Kitchen planner to assist in the design of your kitchen. This will allow you to use IKEA products to build a virtual kitchen using the dimensions of your space.
You need to use the height of your ceilings, the size of crown moulding you may install above the cabinets, and then the height of the lower cabinets with the countertop added.
Once you have this, you will know how much additional space you must build your countertop cabinets. For instance, I have 10′ ceilings in my kitchen, and my countertop cabinet is made of 2-40″ cabinets. This is the perfect spacing from my home to have the cabinet rest on the countertop and go up to the ceiling, allowing space for crown moulding on top of the cabinets.
Please note that I had custom doors made for my IKEA kitchen. This means that while my counter cabinet is made of 2-40″ cabinets, from the outside, it looks like a 60″ cabinet and a 20″ cabinet due to the custom doors I had made. Learn more about this process here.

3.2 Assemble the IKEA Cabinets
Follow the assembly instructions provided by IKEA to put together your selected cabinets. Take your time during this step to ensure a sturdy and reliable foundation for your countertop.
Please note that you may have to adjust the cabinet if you have glass cabinet doors.
In my IKEA kitchen counter cabinet hack, I used 2-40″ cabinets, and the custom doors are 60″ and 20″ to flow with the design in the rest of the kitchen. However, where the glass aligns on the door means that the bottom of one 40″ cabinet and top of the other 40″ cabinet would have been visible through the glass doors. When building my 2-40″ cabinets I did not attach the bottom of one cabinet and top of the other, to solve this issue. I had to reinforce the cabinets to ensure they were still strong enough. IKEA does not recommend this, but it was how I got the look for less!
Want to learn more about my IKEA kitchen with custom doors? Learn more here.

3.3 Position the Cabinets
Place the assembled cabinets on your kitchen counter to determine their layout. Leave enough space for any appliances or additional features you plan to include. Wait to install the cabinets until the countertop is installed.
3.4 Install the Countertop
Have the countertops installed to ensure everything is level and ready for installing the cabinets? Since the counter cabinet will be “resting” on the countertop, this step has to be completed first to ensure the perfect placement.
3.5 Install the Cabinets
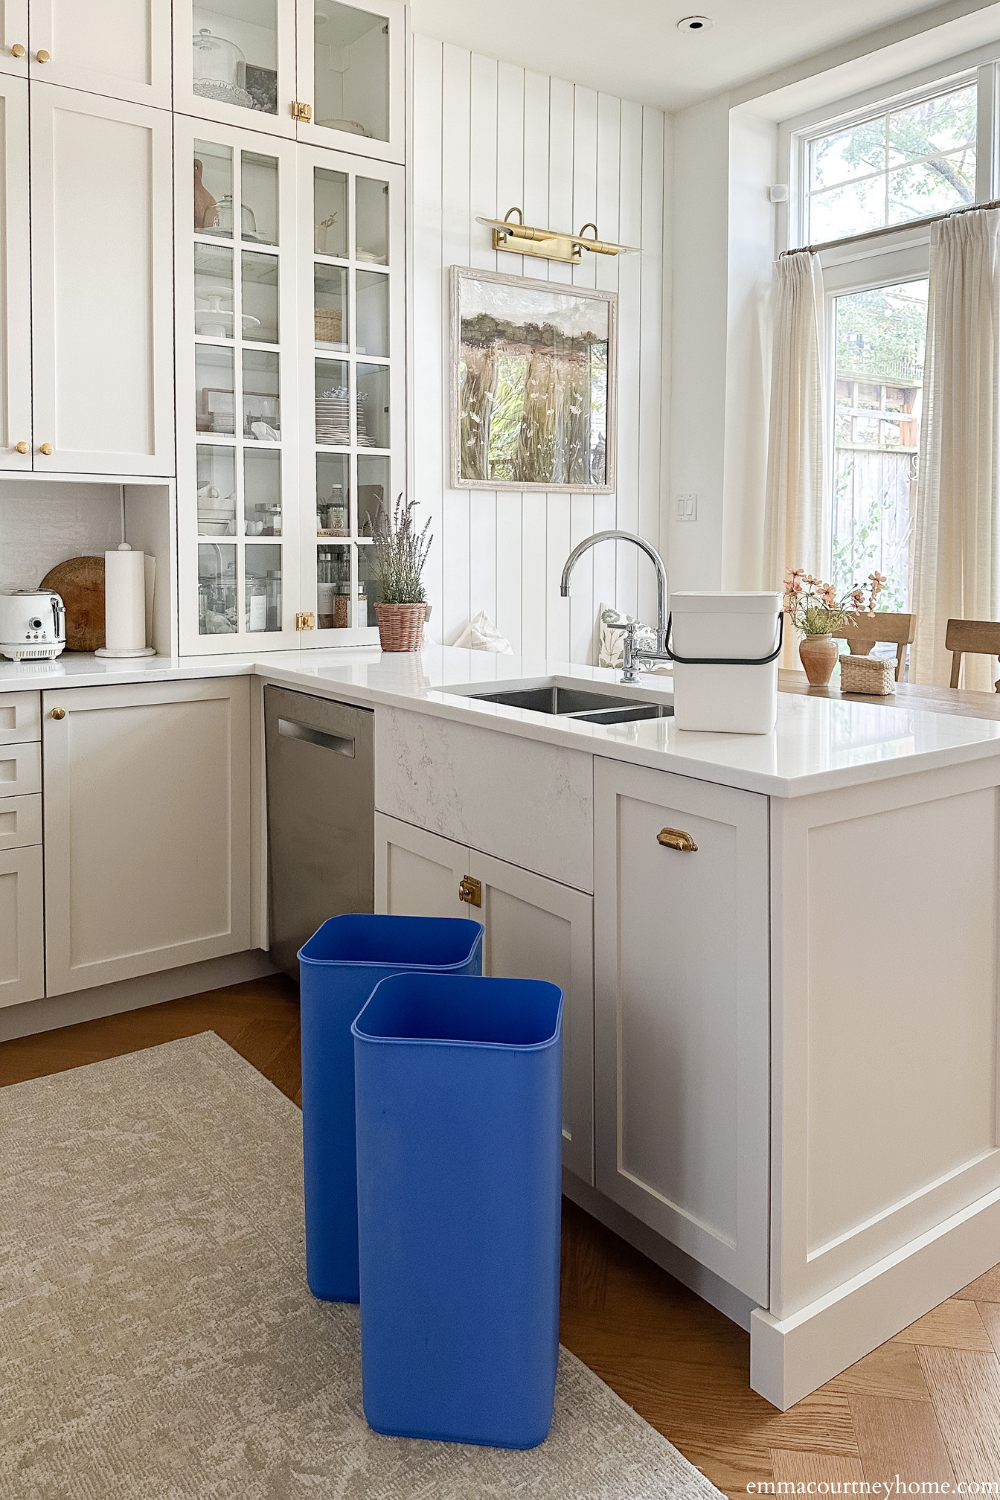
Once the countertops have been installed, you can install your countertop cabinet and the other cabinets. Ensure that you install this cabinet per IKEA’s instructions on the mounting rail, but it appears to be resting on the countertop. It is a bit of a “balancing act” to ensure the installation goes smoothly.
Once this countertop cabinet is placed, you can install any surrounding cabinets ensuring the tops are lined up with the countertop cabinet.
My kitchen has upper cabinets directly attached to this countertop cabinet. The top row of cabinets shares a rail with the top of the countertop cabinet. So this means that everything looks perfectly aligned for installing the crown moulding to the cabinets!
Once you install the cabinets, you can attach the doors. Make sure that the countertop cabinet doors are not scraping against your countertop.
3.6 Add Personal Touches
Now comes the exciting part – customizing your cabinet to match your style. Install cabinet knobs, a cabinet latch, or handles. Then style it how you’d like!
The Versatility of Your New Kitchen Counter Cabinet
4.1 A Convenient Coffee Station
Turn your countertop cabinet into a cozy coffee nook by storing your coffee maker, mugs, and coffee bar essentials. Enjoy a delightful cup of joe every morning without cluttering your main kitchen workspace.
4.2 Chic Mini Bar
Create a chic mini bar for entertaining guests. Stock the cabinet with your favourite spirits, glasses, and cocktail accessories. Your countertop cabinet will be the life of the party!

4.3 Functional Baking Station
Baking enthusiasts can transform their countertop cabinets into dedicated baking station. Store baking tools, mixers, and baking ingredients within arm’s reach for effortless baking sessions.
Is an IKEA Hack Countertop Cabinet right for you?
With the IKEA kitchen counter cabinet hack, you can elevate your kitchen’s functionality and style while staying within your budget. Embrace your creativity, and soon, you’ll have a kitchen counter cabinet with charm and efficiency. Give your kitchen a fresh lease of life with this fantastic hack, and bask in the admiration of your friends and family for your smart DIY skills!

FAQs
No, you do not have to use custom doors! You can use the doors that IKEA sells but might have to play around with the design to ensure it’s visually balanced.
This is really a personal preference when designing your kitchen. Opting for solid doors allowing more flexibility for storing items since you do not have to worry about how visually appealing the items in the cabinet are. For an appliance garage-style cabinet, opt for a solid door!
This is really a personal preference. Counter cabinets can be great but can also be annoying. If anything is on your countertops, it blocks the doors from opening. This can be frustrating! However, this is a great place to gain extra storage and use space that otherwise may be useless – such as the corner of a countertop where you can’t easily cook/prep food.
Yes, but whether or not you can add an outlet to the inside of the cabinet depends on the building code regulations where you live. Though, you can always store your appliances in there without having an electrical outlet.


Hi! I have this exact vision for my new build (purchasing Ikea cabinet bases). Would I order 2 40″ wall cabinets and figure out how to secure them myself? Or do you have further install info? I have designed my kitchen via the Ikea Kitchen Planner and have an appt Monday (today is Sat) to make sure I didn’t miss anything. Please help! : )
Rebekah, Follow the ikea installation instructions making sure when you install them, the top of 1 cabinet, and bottom of the other are touching with no gaps! The door I got was custom though, so I am not sure if you are going that route? Alternatively you can select doors from ikea that would work with these 2.
Emma, you have a beautiful kitchen! What is the width of those counter cabinets and do they have a wide angle hinge? They appear to be open much wider that the standard hinge would allow. Thank you.
Ally, the floor plans are available here https://emmacourtneyhome.com/kitchen-reno-details-links-faqs/, I believe it is 36″ wide! And yes, I used the wider angle hinges from IKEA for these doors.