Pantry Organization
This Post May Contain Affiliate Links. Please Read Our Disclosure Policy.
I wanted to share all of the details for my pantry reorganization. This is something I have wanted to do for a long time because I love baking and it has made baking way easier (and prettier). I was always deterred from this job because when you add up the price of these jars and how many I needed – I thought it would cost hundreds of dollars! When I stumbled across these particular jars, I felt a lot better about it! In the end, this project cost me around $150, which is way cheaper than if I bought the fancy, smaller, wood top jars from Amazon.

Before & After
I’ll share everything I bought as well as the label templates below.
I’m going to share the PDF as well as the Word document for these labels so that you can edit them if you are a little more tech savvy.
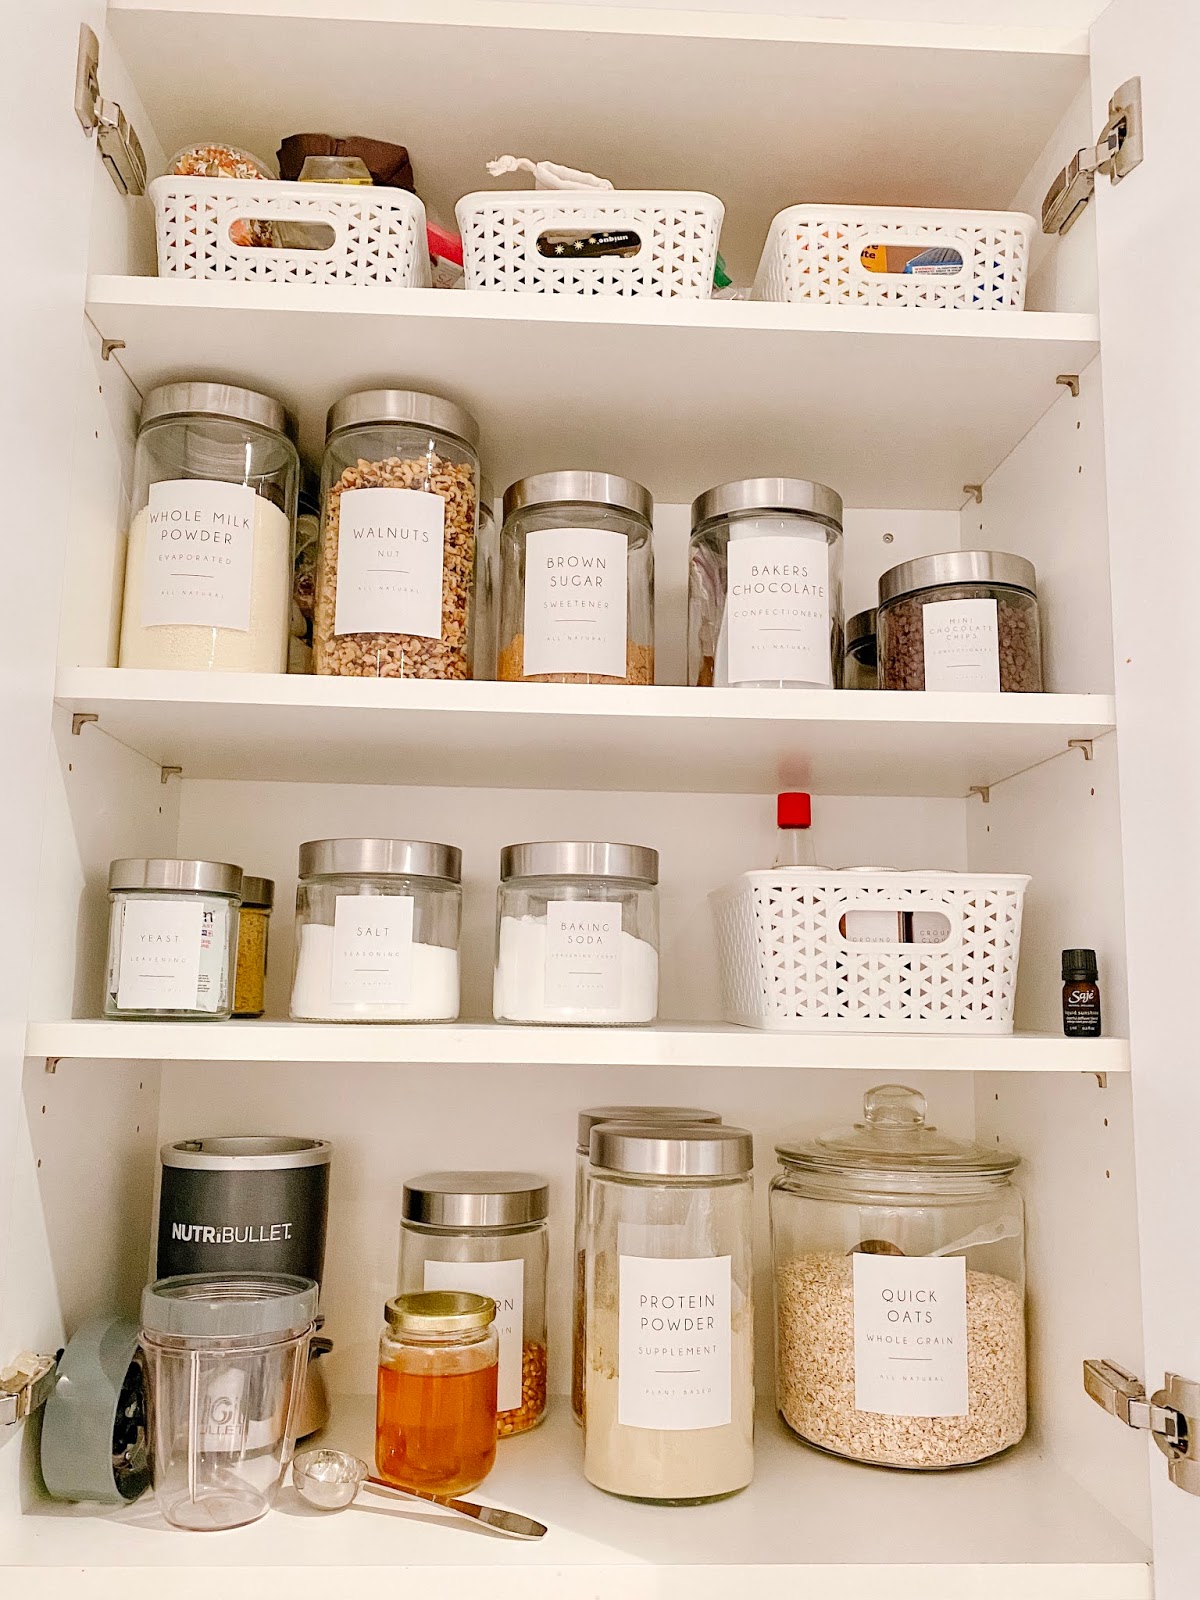
I organized my pantry in a way that works for me, with the items I use most frequently on the bottom and the rest is in no particular order. The white bins are older and from Dollarama (similar are here and here), the lower one has baking spices and extracts, whereas the top ones have things like birthday candles, muffin liners, cake toppers etc. Then, in a lower cupboard I have a box dedicated to cake and cookie decorating.
Don’t forget to give all of your canisters and jars a good clean before putting food in them!
I ran the glass parts through the dishwasher and hand washed all of the lids. Then, ensure they are really dry before you put food in them!
Supplies
Labels
The thing that I liked most about these labels is that they have straight corners rather than most labels that have rounded corners. Also, they are easily removable. Trust me – I had to fix a few that went on straight or needed a bigger container, no mess or sticky residue!

Classic Canister
This is a good price for this style of canister, Amazon is more expensive. Plus KSP has a larger size of this style, double the size for only a few dollars more. These canisters sealer much better than expected. They had a removable plastic lip that created a pretty good seal, but I don’t think I would store brown sugar in these if that makes sense – I think the other canisters have a better seal.
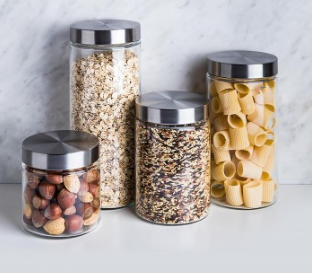
Cylinder Canister
When I purchased these online I was able to purchase a 4-pack with 1 of each size for $14.99, so keep an eye out to see if they restock it! These canisters have a pretty good seal in my opinion! I will definitely update the post if my opinion changes, but they seemed pretty good.
Also, these jars are very similar as the ones sold at Dollarama. The difference that I can see is that these ones are available in larger sizes (and a bit wider), but are otherwise identical.
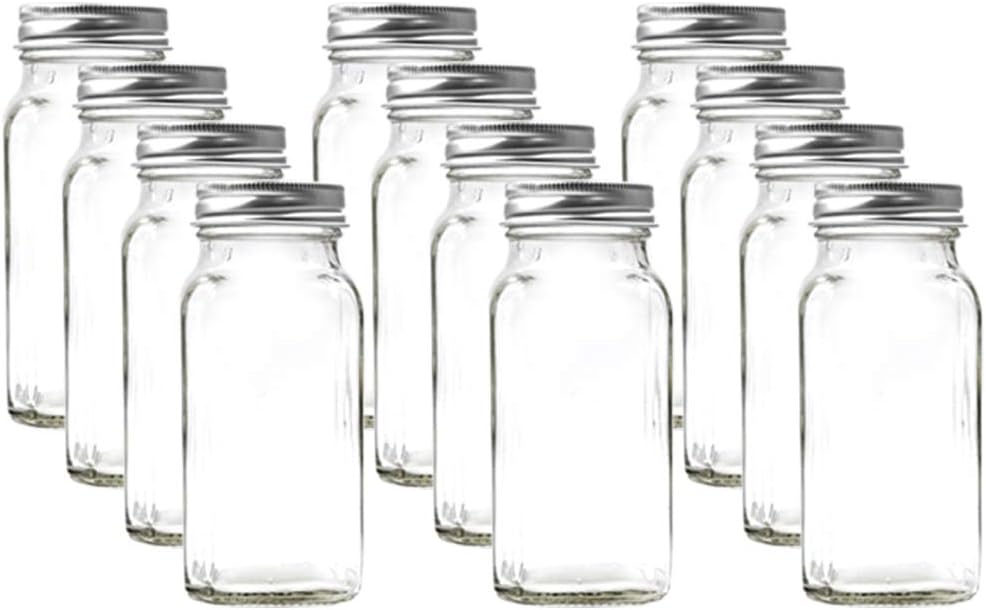
Spice Jars
French Square Glass Bottle, C$19.99
Pretty much all of these bottles are identical when you search for spice jars, this 16-pack is great because it comes with the little funnel to ensure there isn’t a big mess when you transfer all of your spices over!
Downloads
The documents are available for download below from my Google Drive.
I will just quickly mention the spice jars are more finicky. You have to use an x-acto knife and ruler to cut the labels to a smaller size to fit the spice jars. The pantry jars are much easy, just print and stick. If you’re unsure – stick to the pantry jars and decide about the spice jars later!
I have included 3 label sizes. I found the regular size pantry labels didn’t fit well on the smallest jar size, so there are a few labels that are half the size for this.
If you are comfortable with Word, I definitely recommend downloading that word file and edit the files to suit your needs!
Word Document
Pantry Jars / Spice Jars
If you download the word document, you also need to download the font I used, which is free for personal use from DaFont and called Champagne & Limousines, download it here.
If you’ve never downloaded font, its easy. Click download, then open the file, click on the regular font (There are italic, bold etc, but we just want regular for this project. It should be the first font listed in the folder, just called Champagne & Limousines, with nothing after), then click the install button. Once it’s completed, relaunch word, and it should show up in your found under the name Champagne & Limousines.
Open up the Word file, and you can change, add pages etc to the document.
Printing
Printing is easy, you just need to insert 1 label at a time into the bypass tray of your printer. Double check how your printer, prints. My labels were inserted short side (4″ side) into the printer, with the label front facing upwards. I think this should be the same for most home printers, but I double double check this.Make sure you use the paper guides to hold in the label and adjust to their size. These are the little sliders that move back and forth in the bypass tray to adjust to different paper sizes. See the below photo where I am pointing at the grey sliders.

If you try to print all of the labels at once, chances are the labels won’t print straight. I recommend doing one set at a time.
If you print the spice labels, you will need to cut them into 6 labels, making 2 cuts in-between each label. Again, super finicky, but it works and I managed to do it! If you are worried about dirty hands messing up the spice jars, you could apply clear tape over the labels to protect them, but I am not too worried. If I need to print more I will.
I hope you found this helpful. It was a project I loved doing at home and it made me feel 100% more organized! If you haven’t already, I would really appreciate if you checked out my Instagram @emscourtney
As always, if you have any questions, please don’t hesitate to reach out via email or Instagram!